Showing posts with label fruit. Show all posts

Tuesday, July 3, 2012

Orange Peach Carrot Juice

I'm back with another juice recipe! This one comes in a close second to the beet juice I previously blogged about, and it is my husband's favorite so far. This orange peach carrot juice has a beautiful orange hue to it, almost like an orange creamsicle.
Once again, you start with simple, fresh ingredients, blend them, strain them, and sip all the delicious vitamins and nutrients through a straw.
Orange Peach Carrot Juice
Makes 2 servings (about 4 cups)

Ingredients:
2 peeled oranges
2 peaches, quartered, seeds removed
4-5 medium carrots, halved
Juice from one lemon
1/2 inch ginger
2 cups water

Directions:
Place all ingredients in the Vitamix (or other high-speed blender), blend on full speed 1-2 minutes. Strain through a nut milk bag, into a large bowl. Squeeze to release all excess juices. Serve in a chilled glass and enjoy!
I love having fresh juice for breakfast. I especially love having fresh juice for breakfast when it's already made for me, because the second serving is waiting in a mason jar, from yesterday!

Thursday, June 28, 2012

Beet Carrot Apple Juice

Recently I've been making fresh juices, using my Vitamix. I know it's not quite the same as drinking juice from a juicer, but I am making due with what I have, and I have to say it's been pretty tasty! I've made about 5 different concoctions so far, and this Beet Carrot Apple Juice has been by far my favorite.
Basically you start with these simple, fresh ingredients...
Blend them in the Vitamix, strain them through a nut milk bag, and your juice is ready! Here is the process in a nutshell.
Since I am using a Vitamix, not a juicer, I need to add some water too, which is fine, because that equals more juice for me to drink (and it doesn't taste too watered down to me at all)! This recipe makes two servings, so I save one for later, in a canning jar in the fridge.
I like to drink the freshly made one in a chilled glass with a few ice cubes- I prefer my juice ice-cold! This process definitely takes some time, and has a good amount of clean-up involved, but it helps that it makes TWO servings, not just one.

I had a little helper who came out back to watch me shoot photos... but she soon found a "comfy" bed to lay on and heat up in (aka, our grill cover that had blown off). I don't know how she could stand it- it was already at least 80 degrees outside.
Beet Carrot Apple Juice
Makes 2 servings (about 4 cups)

Ingredients:
2 beets, peeled and quartered
2 apples, quartered and cored
4 carrots, halved
Juice from one lemon
1/2 inch of ginger (or more, if you prefer)
2 cups water

Directions:
Place all ingredients in the Vitamix, blend on full speed 1-2 minutes. Strain through a nut milk bag, into a large bowl. Squeeze to release all excess juices. Serve in a chilled glass and enjoy!

Note: If you do not have a high-powered blender, like a Vitamix, I am not sure how well these ingredients would blend up, to make a juice. Please let me know if you try!
I plan on making lots more fresh juices throughout the summer- and will hopefully be back to share a few more favorite combinations!

Sunday, October 2, 2011

Apple Season

Nate, Lilly, and I went apple picking yesterday and brought home 21 pounds of apples.
It was a gorgeous Fall day- Lilly was loving the crisp weather and cool breeze.
There is something about spending the day in the mountains that really gets me into fall mode!
Now I also am in apple cooking/baking mode! Today I started with apple doughnuts. They only used one apple :) BUT, they also used apple cider (which we also brought home yesterday) and apple sauce.
I used this recipe from Peas and Thank You- I added one apple to the recipe- peeled and diced into very small pieces. I just folded the apple pieces in at the very end.
I also plan on making apple sauce, apple pie (Nate's favorite), carrot apple ginger soup, and any other apple recipe I come across that looks good! If anyone has any suggestions, send them this way!

I'm also working on a blog post for our delicious and hearty "warm me up" type of dinner we had tonight, so stay tuned!

Happy apple season!

Monday, July 25, 2011

Granola Bars

We finally had a small break from the heat! It rained a little, late this afternoon and cooled it down enough for me to venture outside with my camera for a little bit. It was great timing, because tonight I made these.
I experimented with this recipe last week and was disappointed with how crumbly they turned out, but the taste was great. I tweaked it a little this time and it came out much better- I could actually cut them into bars this time! Here are all the ingredients I used.
I mixed them together, and pressed them into a pan. Note: Do NOT follow my example of using wax paper- parchment paper works much better, but I was out! The wax paper stuck to the bottom of the bars and I had to carefully peel it off piece by piece.
Then cut them into delicious bars.
Here's the recipe, so you can do it too!

Granola Bars
(Print Recipe)
Adapted from Ina Garten

Ingredients
2 cups oats
1/2 cup shredded coconut, unsweetened
1/2 cup sliced almonds
1/2 cup pepita seeds
1 1/2 cups dried fruit, well chopped (I used mango and cranberries)
3/4 cup rice krispie cereal
1/4 cup flax meal
1 tsp vanilla extract
1/2 tsp almond extract (optional)
1/4 tsp sea salt
1/3 cup maple/agave blend (or just pure agave or pure maple syrup)
1/3 cup almond butter

Directions
Preheat the oven to 350 degrees F.
Toss the oatmeal, almonds, pepita seeds, and coconut together on a sheet pan and bake for 10 to 12 minutes, stirring occasionally, until lightly browned. Transfer the mixture to a large mixing bowl and stir in the flax meal and cereal.
Reduce the oven temperature to 300 degrees F.
Place the almond butter, maple/agave blend, almond extract, vanilla, and salt in a small saucepan and bring to a boil over medium heat. Cook and stir for a minute, then pour over the toasted oatmeal mixture. Add the chopped dried fruit and stir well.
Pour the mixture into a parchment lined 8x12 baking pan. Wet your fingers and lightly press the mixture evenly into the pan. Press the mixture well! Bake for 25 to 30 minutes, until light golden brown. Cool for at least 2 to 3 hours before cutting into squares or bars. Serve at room temperature.
Hints: 
1. Make sure your dried fruit is chopped well to help everything stick together. I put mine in the food processor to make it easier on myself. 
2. Also make sure you stir the wet mixture very well with the dry mixture before pouring into the pan. Use your hands if you find that works better (I did). 
3. Make sure you use slightly wet hands to press this mixture into the pan and pack as tightly as possible.
4. Most important hint- Let cool completely before cutting. I put mine in the fridge for 30 minutes and then the freezer for 30 minutes, so I didn't have to wait 3 hours for them to cool. I am too impatient to wait that long!
I cut mine into 12 large bars. I think I may cut them in half to make smaller squares.

I'm not sure how many recipes I will have to share this week. As I have stated before, I am a menu planner. Lately I have been trying several new recipes every week- usually 4 or 5! This week, for some reason, menu planning was a struggle... I was not inspired to try many new things. I ended up deciding to make mostly tried and true recipes. Here is my attempt at organization (I have been doing this since I started the whole menu planning thing). 
I always post upcoming appointments here, along with our menu, and a running shopping list of pantry staples that we run out of. As you can see from our menu, most of our meals are recipes I have shared on here before. I may have to find something else to blog about this week! Don't let this fool you, as I said, this is a small attempt on organization... I am not nearly as organized as I would like to be! Actually, there are still granola crumbs on the counter right now as I type this, I am not good at cleaning up messes right away either- Nate can attest to that. I have better things to do! Like blog about the mess I just created. And Pinterest pretty pictures of organization, photography, and well-lit spotless kitchens. A girl can dream, right? 

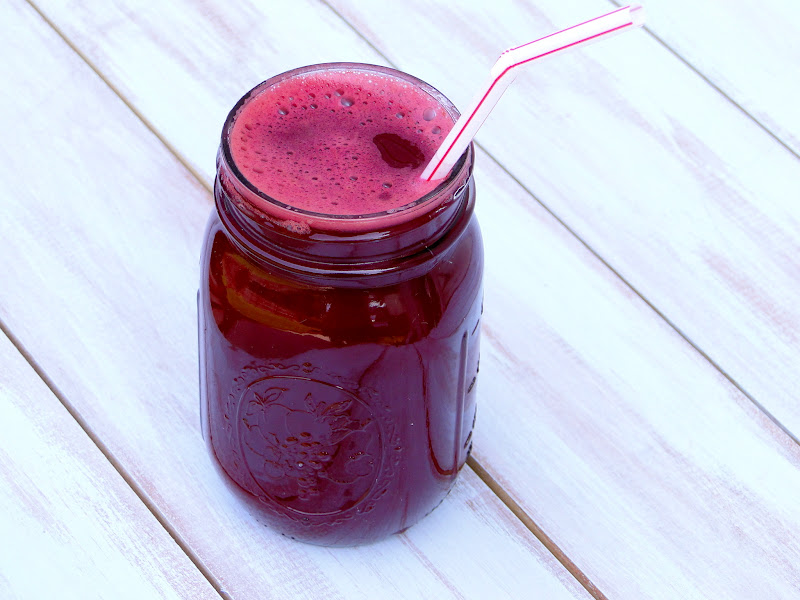
Besides granola bars, this is what I have been snacking on lately. I know you are surprised to see pictures of fruit on this blog. I never take pictures of fruit.
They were $1.99 a pound! I couldn't resist.
Check out the condensation. Even though there was a slight cool down, there is always the lovely humidity here.
I'm going to go clean up those granola bar crumbs now. Really, I am. I will not be on Pinterest first.

Saturday, July 16, 2011

God's Candy

It's summer and I can't get enough of this stuff!
I love how fresh in-season produce tastes... this winter is going to be rough.
These strawberries are sooo sweet.
Plus, fruit is just so darn pretty.
Loving the contrast here.
Juicy...
berries.
Oh summer, please don't fade away...
I will miss you so.

Wednesday, July 6, 2011

Peach Raspberry Popsicles

Talk about a breakfast that shouts SUMMER!!
What better to accompany fresh peaches and raspberries, than a peach raspberry popsicle! These peaches are the sweetest juiciest peaches ever- we bought two of them at the farmer's market and as soon as we tried a bite, went back for a whole bag of them.
I have had popsicle molds in my cabinet forever and don't even remember the last time I used them. I was intrigued by an all fruit popsicle at the farmer's market yesterday and decided to buy it. It was so fruity and natural tasting that I immediately decided to make them myself when I got home. The flavor I tried at the market was nectarine cherry- also a fantastic combo! My popsicle molds are small so it only took 3 peaches to make 6 popsicles.

My method was quite simple: Put 3 sliced peaches in the food processor, add a little sweetener if desired- I added 2 teaspoons of Truvia, food process until smooth. Pour the peach puree into popsicle molds, along with some fresh halved raspberries. Freeze, eat, love.
Today my lunch was the same as dinner last night, but with red beets this time and a side of sauteed beet greens with sauteed summer squash and zucchini. To saute beet greens simply blanch them in boiling water for two minutes, cool off in an ice bath, squeeze out excess water, chop them, and saute in a little olive oil and minced garlic. I skipped the blanching step and my greens were more bitter than usual. Lesson learned. I won't skip that step next time.
I loved all the pretty colors!
All these beet greens...
Sauteed down to this.
Luckily I had some squash too!
Today's cooking outcome: Yummy lunch!
And refreshing fruit!
I'd call it a success.

Friday, July 1, 2011

Red, White, and... Green?

Today I made a spectacular lunch and dessert! I wasn't certain how either would turn out, and thankfully they weren't disappointing. Not even close. Lunch was Quinoa, Tofu, and Kale with Lemony Spinach Pesto. It isn't easy photographing food this shade of green, but I assure you it is delicious! It even had red (sun-dried tomatoes), white (tofu), but no blue! SO I used a blue napkin, since it is almost the fourth of July.
I actually ended up using spinach in mine today, because I forgot to buy kale. I'm sure it is tasty either way.

Quinoa, Tofu, and Kale with Lemony Spinach Pesto
Adapted from Color Me Vegan

Ingredients
2 cups uncooked quinoa
4 cups vegetable stock
2 tablespoons safflower oil, divided
1 block firm or extra firm tofu (12-15 oz), pressed and cubed
1 bunch of kale, finely chopped or 10 oz spinach chopped
1/3 cup toasted pepita seeds
1/4 cup chopped sun-dried tomatoes
salt and pepper to taste 
1 recipe of lemony spinach pesto (see recipe below)

Cook the quinoa according to package directions, in vegetable stock. Set aside.
Heat 1 tablespoon of oil in a large skillet and saute tofu over medium heat until browned on all sides. Remove from pan and transfer to a large bowl. Add the remaining tablespoon of oil (less if using spinach) to the pan and saute kale until tender and bright green. Add to the bowl with the tofu.
Add the quinoa to the bowl, along with the pepita seeds, sun-dried tomatoes, pesto, and salt and pepper to taste. Mix well to fully incorporate pesto. Serve heated or at room temperature.

I used a pesto recipe from Sometimes I Veg- You can find the recipe here. I replaced the pine nuts with cashews because that is what I already had. It really was a delicious pesto recipe! I loved how it only had two tablespoons of oil in the whole batch. It drives me crazy when pesto is super greasy because of all the added oil. This one was light and creamy, but still full of flavor.
We had a lot of leftover watermelon in our fridge that needed to be used soon. I decided to make a minty watermelon seltzer. 
It was simple to make and very refreshing. After a few sips, I decided to get crazy and try making an "ice cream" soda float, using banana soft serve. I had no idea if the flavors would go well together but thought I'd give it a shot. I made banana soft serve and put a few scoops on top of this minty watermelon seltzer. It followed along with my color scheme from lunch: red, white, and green.
YUM!! A wonderful alternative to an ice cream float and perfectly refreshing and delicious!

Minty Watermelon Seltzer Float

Ingredients
1 cup cubed watermelon
7 mint leaves
club soda (I used lime)
Banana soft serve (1 chopped, frozen banana put in a food processor for 5 minutes)

Directions
Put the watermelon and mint leaves in a food processor and process until smooth. Strain through a fine mesh strainer or cheese cloth. Pour into a glass, top with club soda and banana soft serve. Garnish with a mint leaf.
You could also try just the watermelon seltzer without the banana soft serve if banana doesn't float your boat.